
Why creating my own designs?
Especially for my DIY electronic projects, but also for some specific needs around my new 3D printer and at my workspace, I found the opportunities to create my own models. This was mostly because I had way too specific requirements to find something fitting to my needs online created by someone else.
I also saw a great chance of learning something new (or resurrect some old skills as I have been a technical illustrator in a previous life ...).
I also saw a great chance of learning something new (or resurrect some old skills as I have been a technical illustrator in a previous life ...).
The CAD software I used
There are several options for CAD software to use. I decided to use Onshape as my main working device is a Chromebook and Onshape can be run in a Browser as a web service.
That's a great option when working with the Chromebook in PC mode with a mouse.
But when working mobile with the Chromebook, the Android app for Onshape comes in even more handy as it's optimized for touch screens. So I usually use it with the Chromebook flipped to tablet mode.
All in all, a very good way to use a CAD tool at a Chromebook.
That's a great option when working with the Chromebook in PC mode with a mouse.
 |
| Onshape in the browser |
But when working mobile with the Chromebook, the Android app for Onshape comes in even more handy as it's optimized for touch screens. So I usually use it with the Chromebook flipped to tablet mode.
 |
| Onshape in the Android app |
All in all, a very good way to use a CAD tool at a Chromebook.
Example Objects I created so far
One example of something I created around my printer is a very simple filament guide. Because I have a 2 kg spool of filament that can't sit on the printer filament holder, I am using a roller system behind the printer. But that means I need a guide to get the filament to the extruder. There are tons of solutions available online already, but I decided to create my own to meet the angle in which my printer and filament roller are set up.
Another early design was the case for a button. This was part of our DIY electronics projects. It was designed to fit below the cupboard in the kitchen to hold an LED button. I designed it with some screw holes for mounting.
 |
| Filament guide to sit on the top of the printer frame |
Another early design was the case for a button. This was part of our DIY electronics projects. It was designed to fit below the cupboard in the kitchen to hold an LED button. I designed it with some screw holes for mounting.
 |
| Button case below the cupboard |
There was another use case for the kitchen light setup. The LED strip is controlled by an Arduino, which did not look that nice with all the cables in plain sight. So I designed a cover for it, fitting exactly to the place it should go to even including a quarter round part for the end of the LED bar. To mount the cover to the cupboard I included some holes for magnets and put some magnets to the cupboard as well. This enables me to remove the cover very easy in case I want to access the Arduino behind it.
A similar use case has been the case for the Raspberry Pi Zero W in the corridor, which controls our corridor light setup. You can see more about that in my article DIY home automation-corridor. It is made out of two parts, one that attaches to the wall and holds the Pi, the other to cover it and is removable to access the electronics. |
| Electronics cover for the cupboard in the kitchen |
 |
| Raspberry Pi case for the corridor electronics |
For the same project, I was creating a case for the IR movement sensor that is triggering the light in the corridor. This case was designed so all the controls still can be accessed, of course. Also, I was designing it with an angle of about 20 degrees towards the corridor to face it a bit away from the wall.
 |
| The case for the movement sensor |
For my printing area, I wanted a small whiteboard in the style of an A5 notepad to list the printing tasks and time schedule. So I ordered one and was surprised when it arrived. Obviously, I did not read the article description right as all I received was a foil to attach at a fridge for example.
My solution has been to design some kind of clipboard for the foil as well as a hook attachment that could also hold the pen, of course.
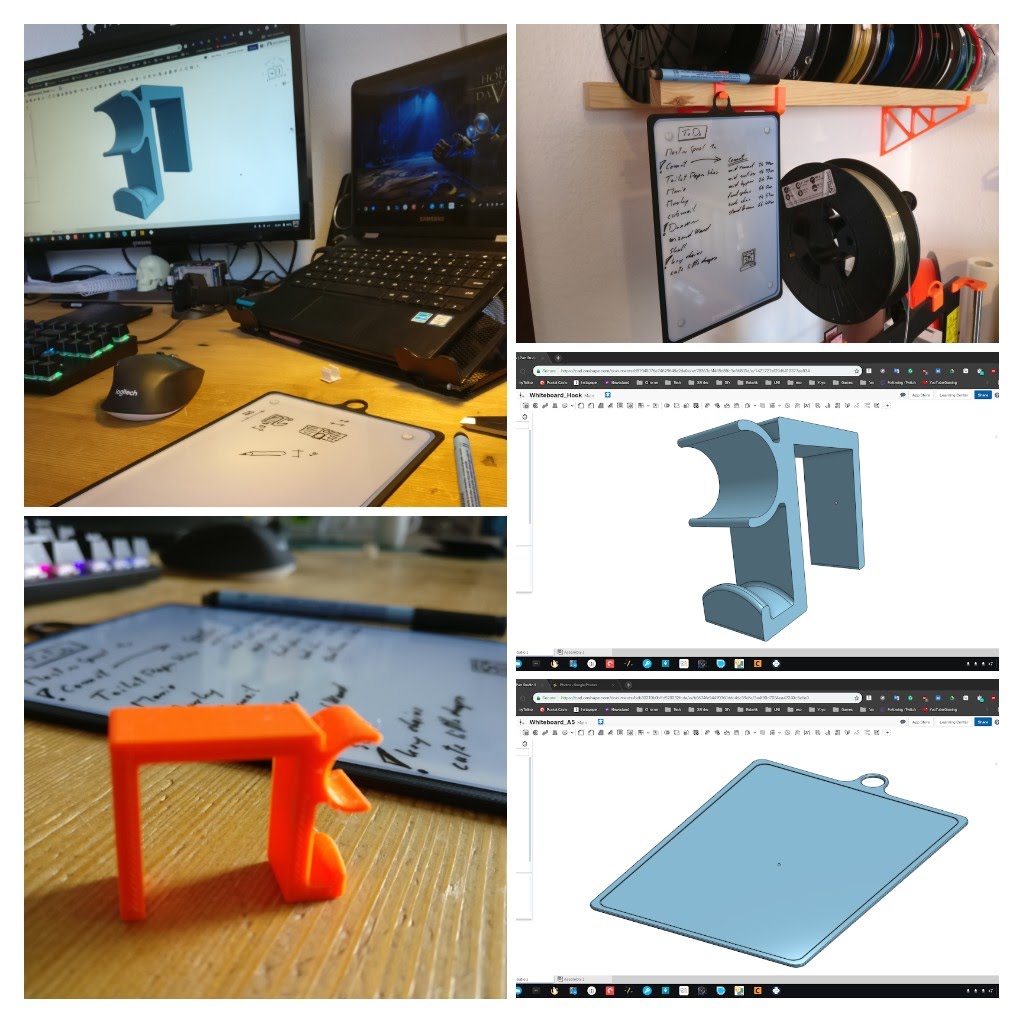 |
| Whiteboard and hook with pen clip |
Last but not least, one of the most requested items I have designed so far is a headphone hook. I made it fitting to our work tables and another version for the windowsills at our office. Lot's of my colleagues are requesting this already so I had to produce quite some. Also, they asked me for the STL file to produce them at the company 3D printer :)
After the first generation, I even added a gap on the inside to insert a rubber layer for improved friction.
 |
| Headphone hook for the office |
Conclusion
3D printing enabled me to create a lot of custom solutions exactly to my needs. The more I am creating my own models and find solutions to my specific situations, the more Ideas I generate for more solutions. I also recognize a change in my way of problem-solving, because more and more often I don't think about where to get something or how to find a solution, but more how or what I could create my self to solve the problems around me. By now I added even more things to my portfolio that I created to solve smaller or larger problems that crossed my path.